Please follow these steps and see the plugin in action.
Go to Plugin Settings
You can navigate to the plugin settings in two ways:
- Dashboard > WooCommerce > Settings > Shipping > Select Australia Post (E-Parcel & StarTrack), to access eParcel & StarTrack Services (or) Select MyPost Bussiness to access AustraliaPost MyPost Bussiness Service
(Or) - Dashboard > Plugins > Installed Plugins > ELEX WooCommerce Australia Post Shipping With Tracking > Settings. This will lead you to Australia Post (E-Parcel & StarTrack) Services.

Enable Real-time Rates & Shipping Label Generation
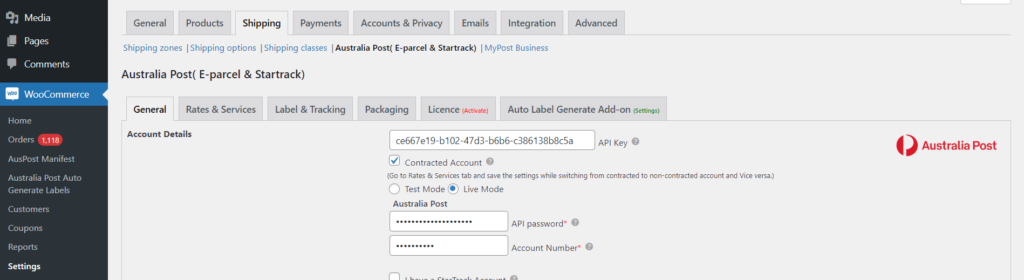
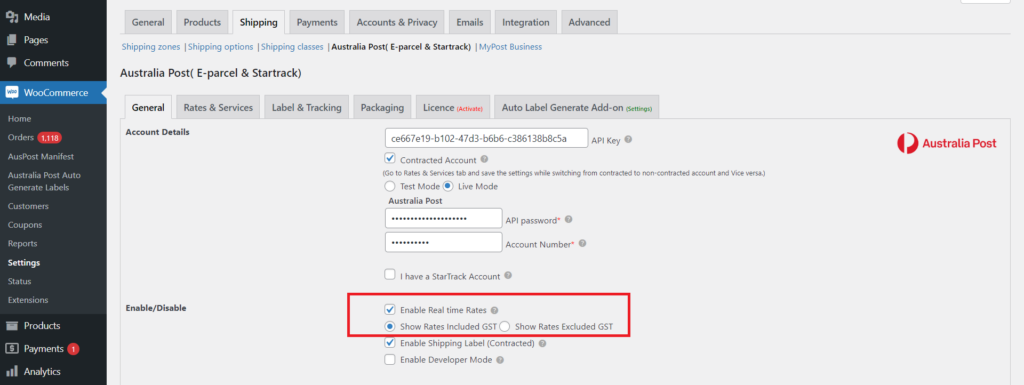
To test accessing Australia Post real-time rates and shipping label generation, enable respective settings in the General tab of the plugin settings, as shown in the screenshot on the left.
The same is to be done under the MyPost Business tab to enable real-time rates for Australia Post MyPost Business.
For detailed information on other generic settings, read the General Settings section of the setting up documentation.
Configure Real-time Rates & Services Settings
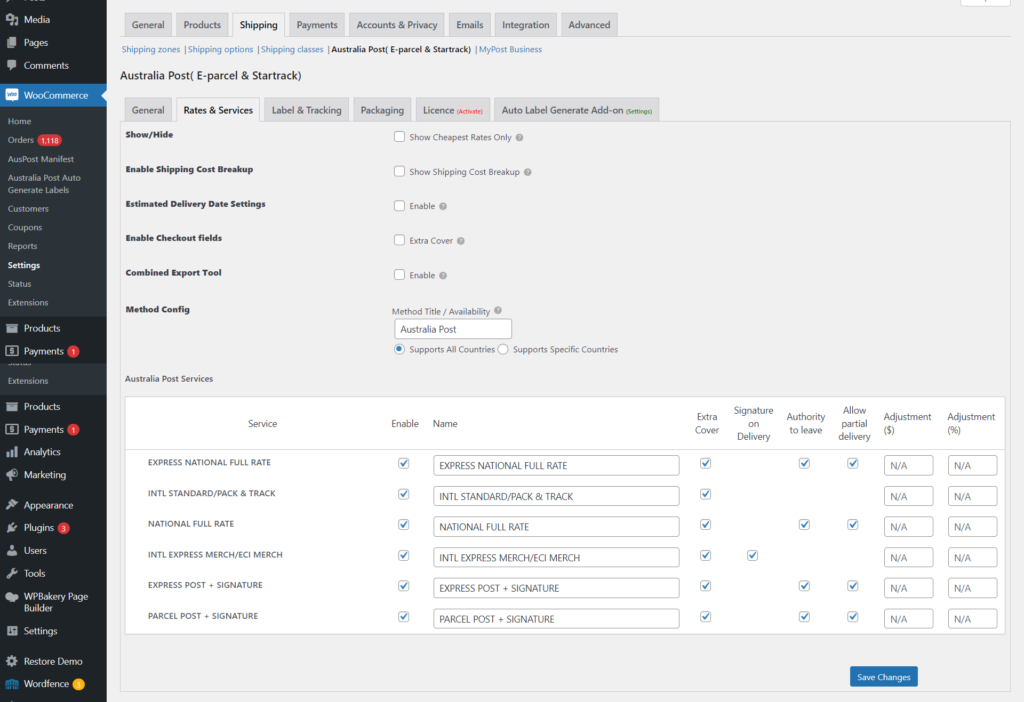
Configure Australia Post shipping services in the Rates & Services tab. You can enable or disable the desired service, set up price adjustments, and other relevant settings.
The same is to be done under the MyPost Business tab to configure real-time rates & services for Australia Post MyPost Business.
For detailed information, read the Rates & Services Settings section of the setting up documentation.
Australia Post Real-time Rates in Action
Follow the below steps for testing Australia Post Real-time Rates:
- Head to the shop page.
- Add an item to the cart and move to the Cart page.
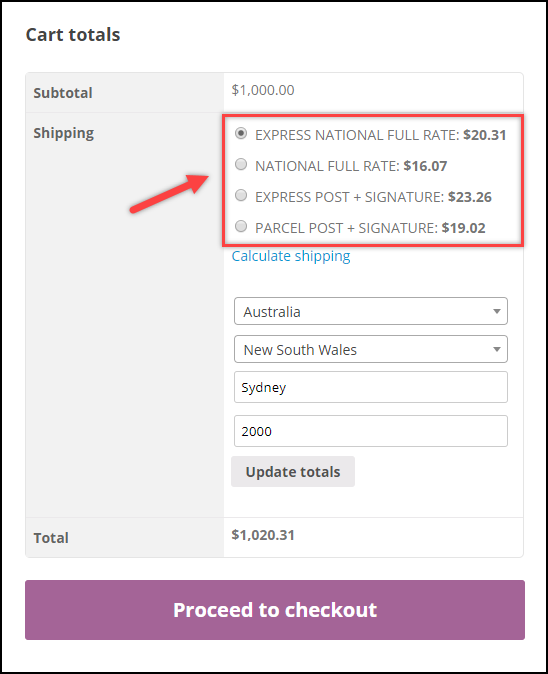
- Update the shipping address to a domestic Australian address on the shipping calculator to access the Australia Post domestic real-time rates and services.
- In the same way, update the shipping address with an international address to access Australia Post International real-time rates and services.
- Next, proceed with the Checkout, enter billing/shipping address details and complete the order transaction.
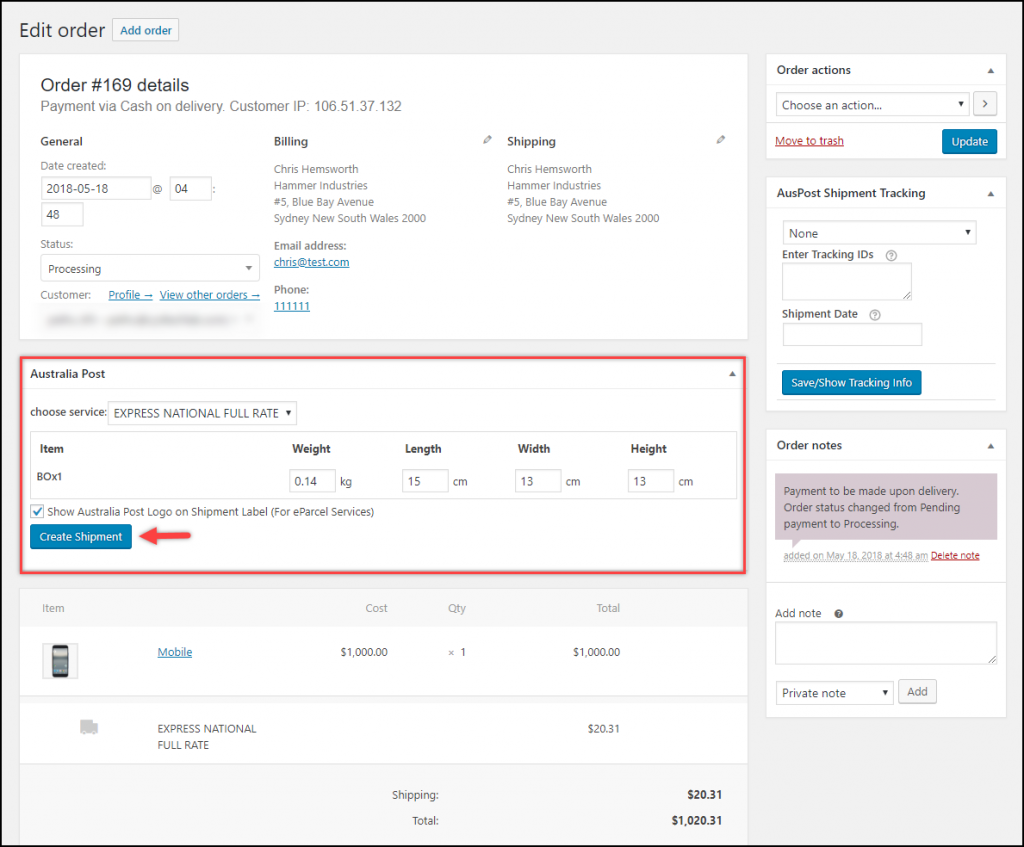
Creating Shipment
After the order is placed, follow the below steps for printing Australia Post Shipping Label:
- Go to WooCommerce Orders page and select the order for which you want to print a shipping label.
- In the individual order page, scroll down to find Australia Post meta-box.
- You can configure the given settings if you want or click on Create Shipment button to proceed further, as shown in the screenshot on the right.
For more details, read how to print labels for Contracted accounts in the setting up documentation.

Generating Shipping Label
Once the shipment is created successfully, you will receive a confirmation message on top of the order page with shipping details and shipment tracking ID.
Next, click on Generate Label button to proceed with label generation, as shown in the screenshot on the left.
Printing Shipping Label
In the next screen, click on Print Label button to proceed with printing the shipping label.
A sample domestic shipping label is shown on the right.
Similarly, if you wish to create order manifest, click on Create Order button and follow the same procedure. To know more detailed information, read how to generate Order Summary Report/Manifest in the setting up documentation.

Video Tutorial
Check out our video tutorial to better understand the plugin features and setup.
Printing shipping labels in Bulk
With our bulk label printing add-on, you can generate multiple shipping labels at once and download them in a single PDF. The add-on settings consist of WooCommerce Order IDs and Order date range, using which you can generate labels in bulk.
Auto-generating and emailing shipping labels
You can create shipments and generate labels automatically using the auto-generate & email label add-on. The add-on will also allow you to send an email notification to the shop owner and customers. Once the add-on is installed, you can find a new tab in the parent plugin settings as “Auto Label Generate Add-On”.
Watch the video to know how to auto-generate and email Australia Post labels.
Contact Us
Check out the product page for more information.
If you have any questions or clarifications, feel free to reach us. We will be happy to help.